1) Digital SLR camera capable of manual settings (m) higher than 8mp
2) A good lens, preferably a macro or telephoto. (Both of these lenses help reduce lens distortion.)
2) Tripod
3) Cable Release
4) Gray Card (for metering)
5) Drafting tape, nails, or thumbtacks for hanging artwork onto wall
6) Professional studio lighting with reflective umbrellas (500 watts or more)
7) Adobe CS3, CS4, or CS5 (You will be using Photomerge)
This article focuses on how to reproduce any form of 2-D artwork with professional camera and lighting equipment.
NOTE: This process is unique to Faville Photo and results in a very high resolution file. You will be taking multiple photos of the painting like a panorama and stitching them together with Photomerge in Adobe Photoshop.
Start out by hanging your artwork on the wall. If your artwork is on a paper medium, tape or thumbtack all four corners to the wall to ensure the artwork is completely flat. If your artwork is on stretched canvas, put thumbtacks or nails in the wall for the top stretcher bar to rest on. Make sure your artwork is as level and as flat against the wall as possible. This will reduce the amount of post production work afterwords. Then find a spot to tape your graycard to the wall as well, as close to the painting as possible.
For photographing artwork, I have found that using two 500 watt (or more) light bulbs, each on a light stand and each reflected into an umbrella, is the best setup. One light goes on each side of the artwork (angled towards the artwork), at the same height as the artwork and at 45° to the artwork. The distance depends on the size of the artwork, but start out with around 3 feet from the wall and from each side of the artwork and move the lighting accordingly.

How to set up your lights and your camera:
• Set your camera's ISO to its lowest native setting This will ensure optimal image quality and reduce or eliminate grain. The lowest ISO is usually 100.
• Set your camera's white balance to either cloudy or tungsten. You might have to do a little experimenting to see which white balance works best in your situation.
• Set your aperture to between f/5.6 and f/11 for optimal image quality. This is the range that most lenses obtain the sharpest image.
• Use the light meter on your camera to find the best shutter speed for your lighting situation.
1. Set your camera according to the instructions above.
2. Find a spot to set your camera where just the bottom right corner of the painting is showing in your viewfinder. Try to get as little wall in the frame as possible.
3. Keep your camera settings (f/stop, shutter, iso) the same for all of the photos. This is important!
4. Focus your lens on the painting and take one photo of the corner of the painting. Use your cable release to eliminate camera shake or losing focus.
5. If it is a small painting, move your tripod to the opposite (left, bottom) corner and take a photo. But, make sure that part of the painting is overlapping in both photos. If no part of the painting is overlapping, move your tripod to the bottom middle of the painting. The larger the painting, the more photos you will have to take. (You can also take more photos for higher resolution.)
6. Keep your tripod the same distance away from the painting each time you move it. To help with this, put a piece of tape on the floor or use the lines in your tiles or hardwood floor for guidance (if you have them). Make sure the front two legs of the tripod are on that line at all times.
7. Move the tripod up to the top right corner of the painting and take photo. Then to the left corner. Again, if the painting is larger, you will have to take more pictures. Just go across the painting in rows, up and down, and make sure there is an overlap in the photos. Remember, take a set of photos across the bottom, move your tripod up, and take a set of photos across the top. Make sure there is an overlap in between the top and bottom row. If there is not, you will have to take a row of photos across the middle of the painting as well. Use your best judgment. If you miss part of the painting, or if it does not overlap, photomerge will not be able to stitch it together.
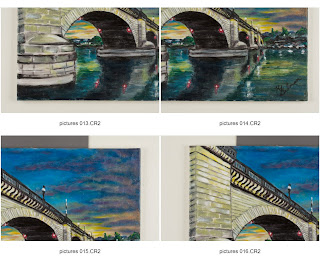
The photo above is my outcome of reproducing a 16x20 canvas print. I took 4 photos of each corner, with enough of the painting overlapping to stitch together effectively in photoshop.
I use a 60mm prime macro lens, which has a 1:1 ratio. These two combined highly reduces any distortion in the images. (The smaller mm, the wider the lens, the more distortion in the photo). Faville Photo also has a rig specifically designed for reproducing artwork. The rig is designed to move the painting, so that the tripod can stay in one spot. This set up allows the lighting to be directed onto one spot, which allows even lighting over the entire painting, even on extremely large pieces. It also reduces the distortion caused by accidentally changing the distance of the tripod in between pictures.
8. Once you have the image files, upload them to your computer. I use Adobe Bridge to view photos. In Adobe Bridge, highlight your photos, then click Tools>Photoshop>Photomerge
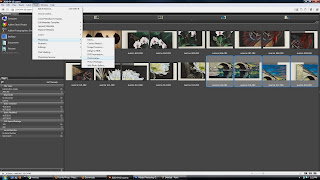
(click photo for larger view)
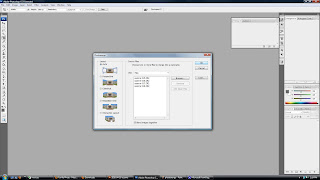
9. These files will open up in Photomerge in Photoshop. You can use the setting "Reposition Only", but I find that "Auto" works better half the time, especially if there is any distortion. Click OK.
10. Once the photos are stitched together (which can take awhile with a lot of photos), highlight all of the layers, right click on them, then click "Merge Layers".
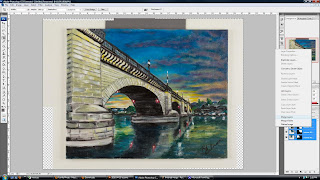
11. Make sure your rulers are showing. If not, click View>Rulers. Then drag a guidline from the ruler to the highest corner of the top of the painting. Do this for all four sides.
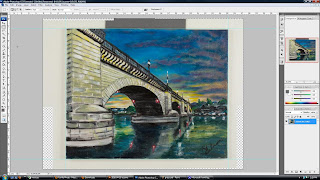
12. Use the Rectangular Marquee Tool to draw a box around the painting, using the guides as a guideline. Then, right click, click on Free Transform. Then, right click again, click on Distort.
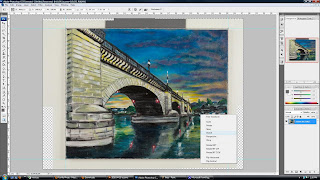
13. Drag the sides and edges of the painting to line up with the guidelines that you created before. This eliminates any distortion.
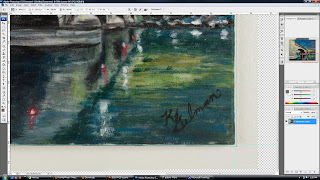
14. Finally, open up the levels adjustments to use the gray card. Image>Adjustments>Levels. Click on the gray dropper between the black and white droppers on the right side, then click on the gray card with the dropper.
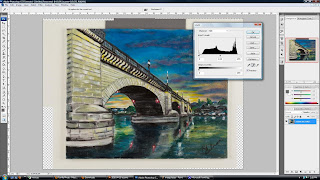
15. Use your guidelines one last time to crop the wall and graycard out of the photo. Having all of these photos stitched together produces a high resolution file of your painting.
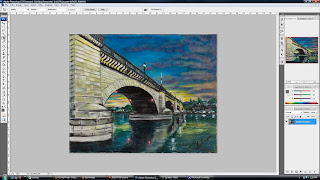
16. If the colors in your image are still off, you can use color balance, Image>Adjustments>Color Balance.
Once you have your final image, you can email it to FavillePhoto@gmail.com for printing onto canvas, photo paper, or any of our other fine art papers. If you would rather have Faville Photo do the reproduction, all color correction and proof prints are included free with the reproduction.
NOTE: If you're looking for a lower quality file portfolios, publication, or internet use, visit this article - Photographing Artwork for Reproduction, Portfolios, or Publication.
www.FavillePhoto.com


